Sunday, February 12, 2012

Seeing double

Long time no post. I've been living on Flickr lately, keeping up with P52 and diving into another P365 at the beginning of the year. I'm popping back here briefly because I think it will be the most convenient place to write up some notes on multiple exposure photography.

This past week the prompt for Project 52 was post-processing. When I saw it last Sunday, my heart dropped. I had thought when I started P52 back in September that I would use the slower pace of this project to, you know, learn things--to maybe take a workshop or find time to pester a mentor or some such thing. I dunno exactly what I was expecting, but I did think I would have some kind, any kind, of handle on post-processing by this point. Somehow, I had let almost half a year go by and I didn't feel any further ahead with my photography than when I had started.This realization gave me a small case of the blues.

But then on Monday, when I logged into Flickr, the home page featured this cool double exposure tool. I used it to mash a few of my photos together and I thought, "huh". Although I couldn't save the results, I was able to see what kinds of images might be possible using double exposures of my existing shots. This set me on the path to Google and YouTube learning.

Making simple double exposures using GIMP
My camera, a Canon EOS Rebel xsi, cannot take multiple exposure pictures--at least not that I know of. Any kind of image manipulation I want to do must be carried out after the fact. I use the Windows version of GIMP, the freeware image manipulation software originally designed for Unix. With the help of Ed Halley's tutorial, I was able create my first few stabs at double exposure shots.

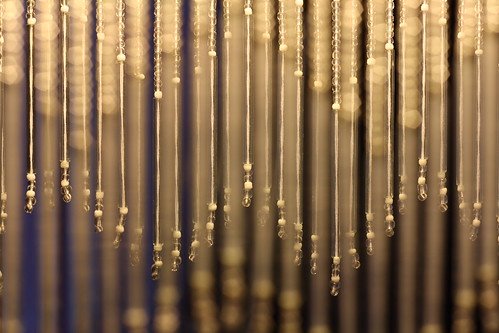
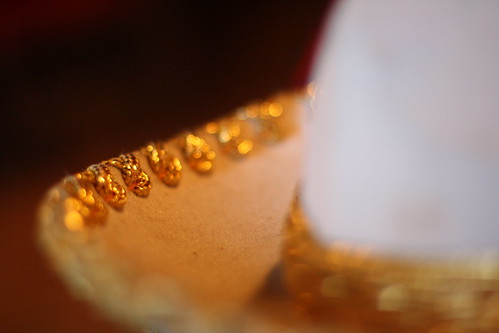
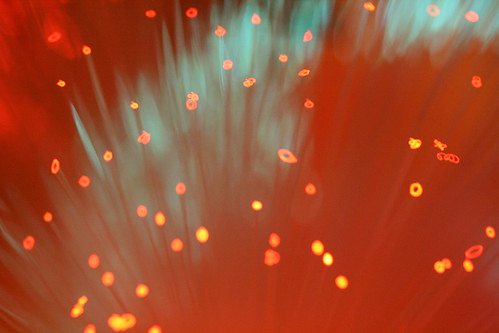
For my first kick at the can, I took this picture, a deliberately blurred shot of my daughter's mini fibre optic lamp:

Aurora

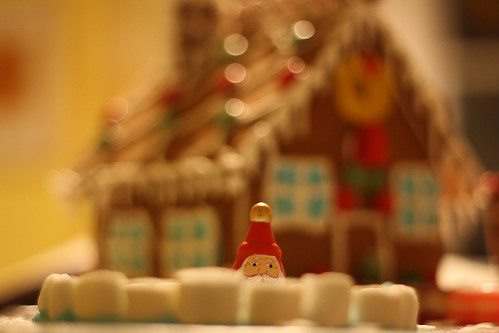
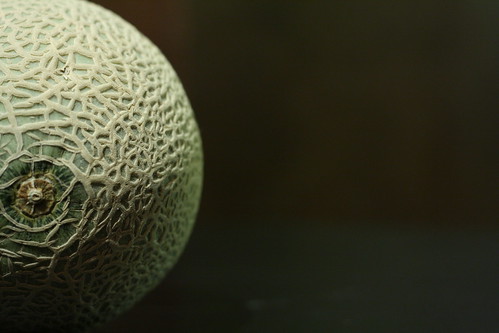
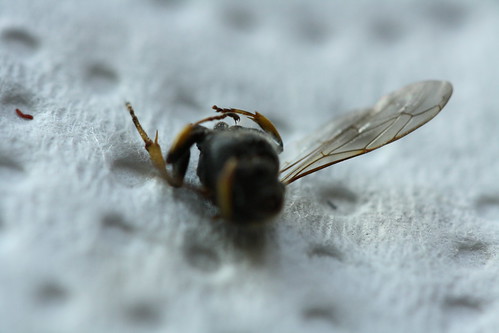
and layered it with this one, a Christmas self-portrait starring my new macro lens:

portrait of the photographer w/ new macro lens

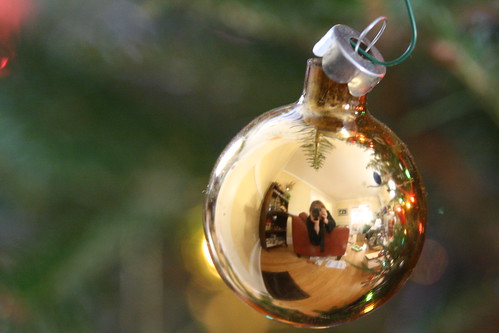
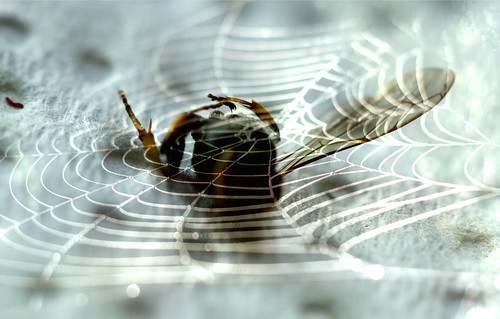
to create this image:

my first stab at double exposure

To do it, I opened both images in GIMP as layers. Before going any further I made sure the Layers box was open by going under "Windows--Dockable Dialogs--Layers". I then used the little scroll bar on that box to reduce the opacity of the top shot until I had a look I kinda liked. I also used the "move" tool (it looks like a cross) from the Toolbox Window to scooch the lamp shot over a bit so that my ornament selfie sat in the pocket of the lamp's curve a bit better. Then I might have played a bit with effects (I forget if I saved any of that nonsense), cropped the shot, and then flattened the image. Walla!

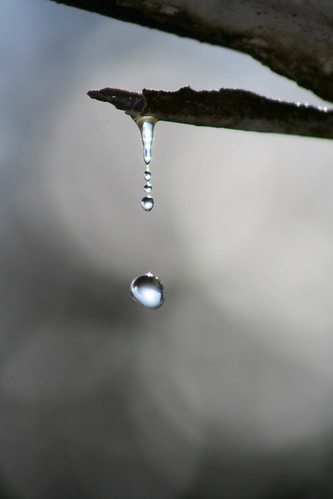
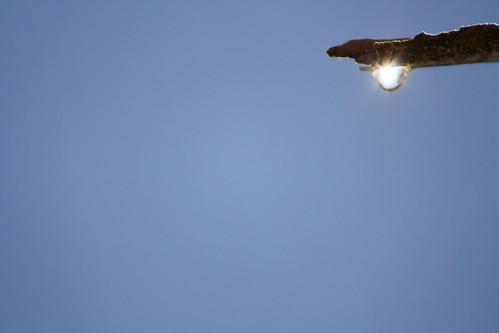
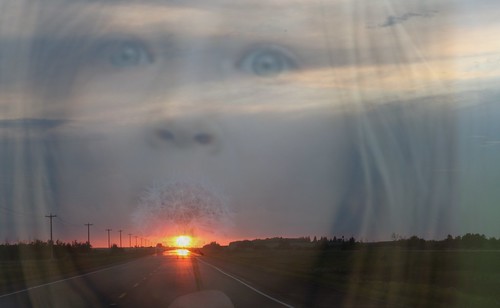
My second attempt tried to achieve something a bit more conceptual. Thanks to the Flickr Double Exposure Machine mentioned above, I realized that the following two shots taken in different months and on opposite ends of the country actually lined up in a super cool way.

speak softly

prairie sunset

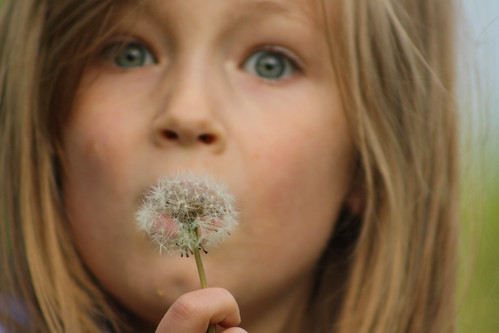
I opened them as layers in GIMP, reduced the opacity of the top shot, and then had to move the top layer so that the dandelion found the best place to sit in and around the sun. Once again, I needed to crop the image, flatten the layers and then save the picture as a single jpeg.

038:365


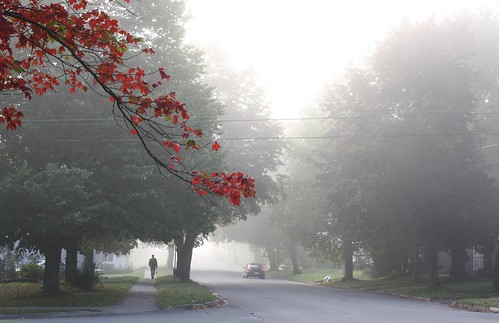
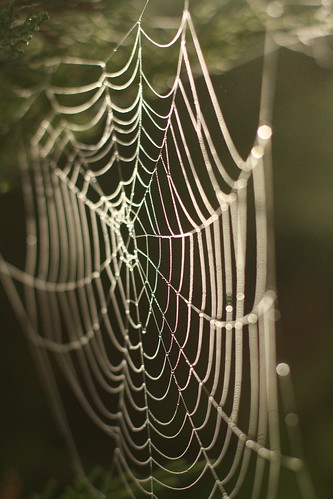
For my final try with double exposures, I took this spider's web that I shot on a foggy day in November:

trapping light

and combined it with this dead fly that my husband found on the floor and saved for me the week I got my new macro lens. Ah, love:

003:365

Now, before I could merge these two shots, I had to open the first one and rotate it to make its orientation landscape. I then saved it and opened the two shots as layers. Once again, I reduced the opacity of the top layer and moved one of the layers around to get the photos to line up in an interesting way. The image still looked like crap but I was too hooked on the concept to give up so I started fiddling with brightness and contrast settings and I may have moved the curves a bit to get what I thought was an eye-catching shot. Once again, I then cropped and flattened the image before saving it.

039:365

Charlotte's All You Can Eat Buffet

Having made it this far, I was not content to rest. So...


Taking it to the next level: multiple exposures merged as a single shot


My googlemication last week brought me to several YouTube videos featuring MALE PHOTOGRAPHERS talking while they moved BIKINI-CLAD WOMEN about in images in order to put EVEN MORE bikini-clad women in the same picture. "I can do that," I thought, "and no women will freeze their tits off in the process."

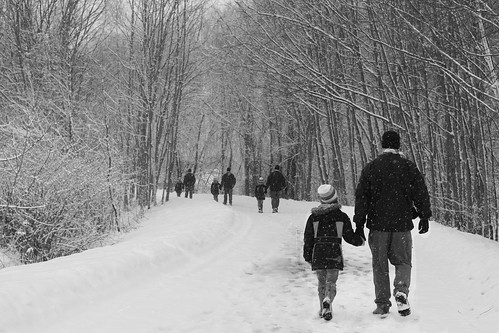
So this is what I did. I enlisted the family to go out on the walking trail with me. I set the camera up on a tripod, adjusted my settings for light, subject-matter, etc, placed the 2-second delay on the shutter and then had my family walk away from the camera and keep walking until they walked around a curve in the trail. While they did this, I took about 8 shots without moving the camera. At all. This is important. Do not move the camera. Don't even breathe on it.

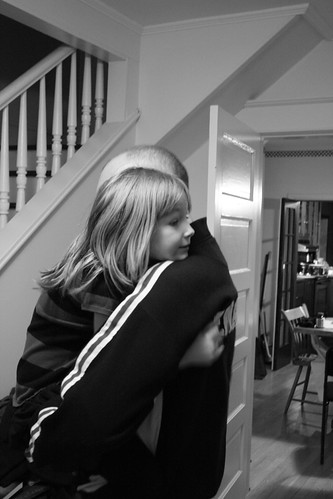
When I got home, I looked at the shots and chose 4 on the basis of how the subjects lined up. I then opened them as layers in GIMP. OK, now I am going to show you the final shot and walk you through how I did it:

041:365

As I say, I opened the shots as layers in GIMP. When I did this, the top layer was the active one as shown in the Layers Box. Remember the Layers Box? We opened it back at the beginning of the Double Exposure instructions above. If you skipped those to get to this part of the write-up, then don't forget to open the Layers Box under Windows--Dockable Dialogs--Layers.

Step 1: In the Layers Menu (not to be confused with the Layers Box), select Mask--Add a Layer Mask. In the dialog box that then comes up, select: Black (transparency). OK. Now watch as your subject disappears and the subject from the layer below becomes visible. Remember where that first subject was.

Step 2: On the ToolBox window, select the Paintbrush Tool--using the options in the window below make it a good size for what you want to do. I made mine Circle (75) with a scale of 10.0. Make sure the little boxes in the middle of the toolbox show white on top (foreground colour) and black on bottom (background colour). The arrow beside them lets you switch their order.

Step 3: Now paint in the place where your subject vanished. Miraculously, it will reappear.

Step 4: Once you've painted your subject into place, go back to the Layers Menu and select Stack--Select Next Layer. (You can also do this step and step 1 by right mouse-clicking on the Layers Box and choosing the options there.)

Step 5. Repeat Steps 1. and 3. Keep doing this until you have an image w/ multiple subjects.

Step 6. Crop, flatten save.

Here are the two attempts I did today:

slide

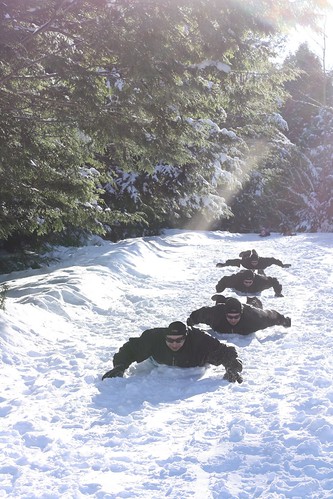
Slide! (Note: make sure you paint shadows as well as subject)


skate

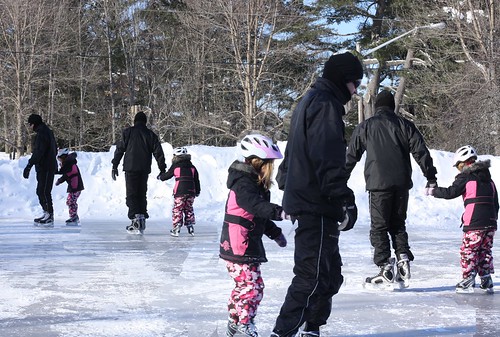
Skate--it was like our own little multiple-exposure triathalon this weekend.

What you will find is that any variance in lighting or camera position becomes so damn obvious; the skating shot is actually dreadful when you look at it closely. If you didn't use a tripod with a shutter-delay, you'll be pooched. As it is, many of my shots suffer from inconsistent lighting from frame to frame. That's what I need to learn how to fix. Goodie, so much more learning to be done.

Tuesday, September 6, 2011

Game on

OK, I think I have invited everyone to join the Flickr group who expressed an interest in participating in P26/52. If you want to join and you haven't heard from me, make sure I have the URL to your Flickr page. If you did get your invitation, make sure you accept it and head on over to the group page. I've written up a welcome there and a brief description of this week's prompt. I'll likely continue to deal with the business end of P26/52 over there. Even though the group is by invitation only vis-a-vis posting to it, anyone can look in on the group's pictures. To do this, here is the URL for the group's main page: http://www.flickr.com/groups/p26-52/

The first week is now underway. The prompt is Depth of Field: Deep and photos are due by the end of Sunday night. Shoot if you dare.

Friday, September 2, 2011

The Second Coming

I've taken a month off and now I'm eager to get back behind the shutter. Who wants to do a P26/52 with me? Misty from Project 365 is in. Are you?

Here are the details. Dust off your camera and set up a Flickr account. Once you have the Flickr account, let me know and I'll send you an invitation to post to our newly minted P26/52 group. Starting on Monday September 5th, we'll all begin taking pictures to a set list of themes. There will be one theme a week and no requirement whatsoever to take daily photos--thus making it a far less daunting challenge than Project 365. At the end of each week, put your best photo or a handful of photos up on the Flickr group. They'll all sit side by side there in a way that we can learn from each other.

So why 26 or 52? How does that work, you ask? Look at the list of themes below. If you want to tackle all of them, then commit to a P52. If you want to do only those that serve as a camera/photography tutorial, then do only the odd numbered ones and post your photos biweekly at the end of the appropriate week. If you want to tackle only those prompts that focus on subject matter, then jump in at week two and do only the even numbered themes. Or you can be a will-o-the-wisp, jumping in here and there. Whatever. I'm not your creativity cop.

Is this as clear as mud?

Here are the themes. I've added dates until the New Year so you'll get a sense of the time-line. Each week starts on a Monday and the deadline to upload photos for that week is the end of the day on Sunday--you know, unless you're a little bit late.

Week 1: Depth of field: deep (Sept 5-11)
Week 2: Dining out (Sept 12-18)
Week 3: Depth of field: shallow (Sept 19-25)
Week 4: Take a hike (Sept 26-Oct 2)
Week 5: Bokeh (Oct 3-9)
Week 6: Yellow (Oct 10-16)
Week 7: Seen from below (Oct 17-23)
Week 8: Body parts (Oct 24-30)
Week 9: Seen from above (Oct 31-Nov 6)
Week 10: Texture (Nov 7-13)
Week 11: Black and white (Nov 14-20)
Week 12: Blue (Nov 21-27)
Week 13: Portraiture (Nov 28-Dec 4)
Week 14: Beloved (Dec 5-11)
Week 15: Night photography (Dec 12-18)
Week 16: Spice (Dec 19-24)
Week 17: Artificial light (Dec 25-Jan1)
Week 18: Orange
Week 19: Self-portraiture
Week 20: Smiles
Week 21: Overexposure
Week 22: After
Week 23: Post-processing
Week 24: Smell
Week 25: Image Distortion
Week 26: Red
Week 27: Abstract photography
Week 28: Music
Week 29: Looking in
Week 30: Gathering
Week 31: Industrial photography
Week 32: Wind
Week 33: Filtering
Week 34: Green
Week 35: Shutter speed: freeze
Week 36: Warmth
Week 37: Shutter speed: blur
Week 38: Danger
Week 39: Backlight
Week 40: Motherhood or Fatherhood or Childhood
Week 41: Narrative photography
Week 42: A-Z
Week 43: Macro
Week 44: Shoes
Week 45: Time-lapse photography
Week 46: Water
Week 47: Landscape photography
Week 48: Humanity
Week 49: Street photography
Week 50: Purple
Week 51: Flash photography
Week 52: Animal, mineral or vegetable

OK, who's in?

FYI, I will continue to put my pictures up here on this blog for those who just like to look in every now and then.

Wednesday, July 27, 2011

The fat lady sings

This was my first picture for Project 365, taken a year ago:

001:365


This is my last picture for Project 365, taken earlier tonight:

365:365


I did it. I completed the behemoth that is Project 365--and I didn't do it alone. Three other people who started this whole rigmarole with me also finished. Mad props to Alejna, Misty and Steve. I feel a bit like celebrating but mostly I feel burnt out. It's an impossibly hectic pace this taking a photo a day gig--especially when you start caring about your results and about actually improving along the way. That's when you end up taking as many as 200-300 pictures in a single day (e.g. droplet shots) in order to learn what you need to and to get the result you were hoping for. And furthermore, taking the pictures isn't nearly so taxing as looking thorough them, deleting the duds and deciding on a single winner for each and every day. Once that is done, there is all the finicky uploading and posting. Aye caramba! I will be so happy to reclaim those hours in my life.

But I am very happy that I not only took it on but also stuck with it 'til the bitter end.

Here are a few things I learned along the way:
1. I take most of my pictures between 6 and 7:30 pm b/c that's the only time my husband is home and this reality creates the illusion that I'll be afforded time and concentration.
2. THIS IS AN ILLUSION. Plus, it means that most of my photos are fuelled by the dinner-hour blood sugar crash.
3. It is very hard to take pictures with a 6 year old next to you at all times.
4. Thankfully, 6 year olds are about the most photogenic objects on earth. (93 of the photos are of her plus 3 or 4 of just her hands)
5. Your family will never stop to let you take photos which means you get a lot of shots of them walking on ahead.
6. White balance is a bitch.
7. Flowers taken with a shallow depth of field are lovely--so lovely in fact that you come to depend on them when time keeps marching hurriedly on.
8. There are more interesting things outside my front and back door than I ever would have guessed a year ago.
9. I fear I am house-bound.
10. Birds are everywhere and are stunning and quirky and, after a while you know exactly which bird is going to be on the feeder by its distinctive call.

I learned so much more but I won't go on about it all here. I did learn to use my camera with skill and intent and that's what I set out to do. I also learned that I have so very much more to learn--things that are impossible to absorb while taking daily pictures, working at a professional job and parenting a 6 year old. What I do know is that I want to continue my education.

Come fall I plan to start a P52 (weekly) or maybe even a P26 (bi-weekly)--wherein, I will set fixed prompts far in advance. Each prompt will force me to treat it as a photography tutorial. For my part, I'm hoping to have enough time to read up on technique and also look at how a handful of professional photographers and/or artist photographers approach the subject of the prompt. I'll post the results of that project here--sometimes a single photo; sometimes a group or series; but never a photo a day. That tank is now empty.

Want to join me? I am always happy for the company. If so, send me an email or leave a comment and we can start planning from there. In the meantime, I'm going on vacation and, yes, I will be taking my camera with me.

Now please allow me to leave you with a handful of my favourite shots from this past year.


007:365

007:365


016:365

016:365


026:365

026:365


035:365

035:365


053:365

053:365


070:365

070:365


096:365

096:365


138:365

138:365


156:365

156:365


160:365

160:365


181:365

181:365


183:365

183:365


189:365

189:365


205:365

205:365


209:365

209:365


226:365

226:365


229:365

229:365


Going

Not a 365 shot b/c taken the same day as above.


More than genes

Not a 365 shot b/c taken the same day as the 2 above. March 13th was a very good day.


269:365

269:365


273:365

273:365


280:365

280:365


298:365

298:365


303:365

303:365


312:365

312:365


328:365

328:365


341:365

333:365


355:365

355:365


And my favourite shot of the year:

353:365

353:365

Tuesday, July 26, 2011

All but the very last one

358:365

358:365 Done


359:365

359:365 Bee feet


360:365

360:365 This is down the street from me and I've been meaning to shoot it all year long. No time left, I guess.


361:365

361:365 At the Mexican restaurant


362:365

362:365


363:365

363:365 Other things I snap


364:365

364:365

________________________________

One more picture to go. I'll take it tomorrow and put it up in a few days with a summary post. It's so close now I can taste it.